


Modifying your vehicle exterior often begins right at the front and rear illumination sources. You face a core challenge here. You must balance aggressive automotive aesthetics against strict road safety laws. Poor installation creates serious risks for daily drivers. It significantly reduces your nighttime visibility. It invites severe legal liability during traffic accidents. Careless techniques can even destroy expensive factory housings. Our comprehensive guide tackles these challenges head-on. We provide a professional-grade evaluation of today's top tinting methods. You will learn exact material selection criteria for maximum durability. We also deliver a reliable, step-by-step installation framework. Whether you upgrade standard assemblies or modify advanced premium car lights, preparation dictates your success. By following this protocol, you can achieve a flawless finish. You will protect your underlying lenses. You will also stay safely on the right side of local traffic regulations. Customizing your vehicle should never compromise your safety or peace of mind.
Method Superiority: Vinyl film provides predictable light transmission and reversibility, whereas spray tints pose permanent risks to housing integrity.
Material Matters: The longevity and finish of the tint depend heavily on choosing cast (PET) films over calendered (PVC) alternatives.
Safety & Compliance: Altering the lumen output of car lights carries legal implications; verifying local Visible Light Transmission (VLT) laws is a mandatory first step.
Preparation is Critical: 80% of installation failures (bubbling, lifting) stem from inadequate surface decontamination and improper heat management.
Two primary modification methods dominate the automotive aftermarket industry. You must evaluate them carefully before proceeding. Making the wrong choice often leads to costly replacement parts.
Mechanism: Aerosol solutions involve applying a translucent black or colored clear coat directly onto the lens surface.
Drawbacks: Getting a perfectly even coat is notoriously difficult. Uneven application heavily degrades optical clarity over time. The spray naturally pools in the lower curves of the plastic. If you make a mistake, the correction process is brutal. You must wet-sand the cured clear coat off the polycarbonate. This aggressively strips the factory UV protection off your car lights. Once you remove this factory UV hard coat, the plastic will rapidly turn yellow.
Verdict: We generally do not recommend aerosols. High-value vehicles deserve better treatment. Novice installers should avoid this permanent approach entirely.
Mechanism: Applying an adhesive-backed, stretchable polymer over the housing offers superior control.
Advantages: It delivers a highly consistent Visible Light Transmission (VLT). Premium films include advanced built-in UV protection. They even offer self-healing properties against minor road debris. Best of all, vinyl is completely reversible. If you receive a citation, you just peel it off.
Decision Logic: This remains the undisputed industry standard. It carries exceptionally low risk. It guarantees high predictability for complex curves. Dealerships and high-end customization shops rely strictly on polymer films. They understand the value of protecting the original equipment.
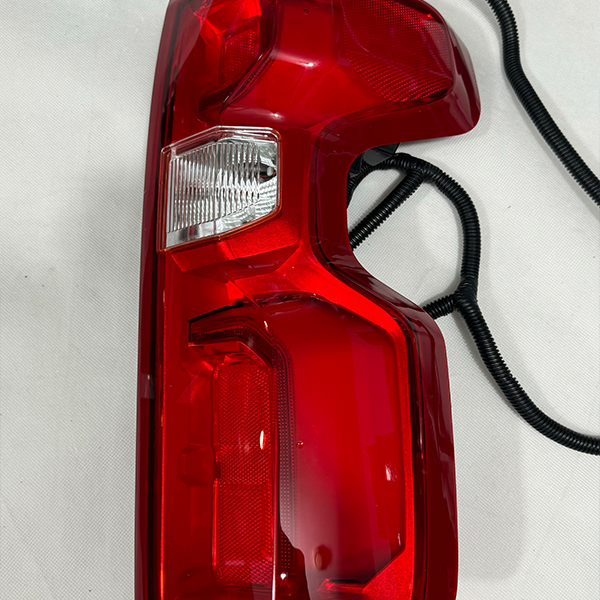
Before applying any material, you must thoroughly understand the rules. Department of Transportation (DOT) compliance varies widely across regions. State laws strictly dictate minimum visible distance requirements.
DOT Compliance & State Laws: Most jurisdictions require brake illumination and reflectors to remain visible from at least 500 feet away. If your modification reduces this distance, you violate state traffic codes. Local police actively look for overly dark housings during routine patrols. A simple traffic stop can result in hefty fines. You might also receive a "fix-it" ticket requiring immediate removal.
VLT (Visible Light Transmission) Impact: Different tint percentages physically reduce lumen output. They also alter factory beam patterns dramatically. A 20% tint blocks 80% of exiting illumination. This creates a severe safety hazard on dark roads. Factory housings rely on precise internal reflectors. Dark films choke this carefully engineered light output. Light smoke films offer a better balance. They tone down the chrome aesthetics without blinding following drivers.
Liability Risks: Insurance claim denials are a harsh reality in today's legal climate. Imagine someone rear-ends your vehicle at a stoplight. Investigators will closely examine your rear taillights. If authorities deem them illegally modified, serious trouble follows. Adjusters may assign you at-fault status for the collision. They will argue the following driver could not see your braking signals. Always check local statutes first. Consult your insurance policy guidelines before making aesthetic changes.
The market offers two main film categories. Your choice impacts longevity, clarity, and ease of installation.
Calendered (PVC) vs. Cast (PET) Films: Manufacturing processes dictate how a film behaves during installation.
PVC (Calendered): These films are cheaper and much thicker. Manufacturers roll them out under high pressure. Because of this process, they inherently shrink over time. Installers struggle to conform them around aggressive compound curves. The material constantly fights to return to its flat shape.
PET (Premium Cast): These films represent the premium tier. Manufacturers pour them as a liquid. They dry in their natural state without internal tension. They offer pristine optical clarity. They boast superior dimensional stability in hot weather. You will find them much easier to install on complex shapes.
Dry vs. Wet Application: Consider adhesive technologies carefully. Modern premium films utilize advanced dry application methods. They feature microscopic air-release channels within the adhesive layer. These tiny channels prevent trapped moisture and blistering. You simply press the air out using a squeegee. Wet application often masks installation mistakes temporarily. It frequently leads to poor long-term adhesion.
Adhesive Quality & Removal: Cheap adhesives literally bake into the plastic over time. When you finally try to remove them, they strip the factory coating. High-quality adhesives protect the housing effectively. They allow for completely clean removal years later. Investing in premium materials saves you money in the long run.
Feature | Calendered (PVC) Film | Cast (PET) Premium Film |
|---|---|---|
Optical Clarity | Moderate (Can appear slightly hazy over time) | Excellent (True glass-like finish) |
Durability & Stability | 1-2 Years (Prone to shrinking and cracking) | 3-5+ Years (Highly dimensionally stable) |
Installation Ease | Difficult on aggressive compound curves | Highly conformable with mild heat |
Removal Process | Leaves heavy adhesive residue behind | Clean removal, fully protects the lens |
Proper technique separates amateur jobs from professional results. Follow this strict framework meticulously.
Surface preparation requires your absolute focus. Eighty percent of installation failures stem from rushed prep work.
Strip existing waxes and sealants thoroughly. Use a diluted isopropyl alcohol (IPA) solution. A 70% IPA to 30% water mix works perfectly.
Run an automotive clay bar over the entire lens. This removes embedded microscopic contaminants. It leaves the surface feeling as smooth as glass.
Tape off all surrounding paintwork securely. Use high-quality automotive masking tape. This protects your clear coat from stray razor blades.
Clean the panel gaps rigorously. This prevents the film from pulling hidden dust onto the adhesive layer.
You must establish a "glassed" surface first. Tack the film firmly at the highest point of the lens. Create a "cold pre-stretch" tension horizontally. This distributes the material evenly across the surface. It prevents dangerous distortion in the underlying adhesive layer. Do not use heat during this initial stretching phase. Cold stretching maintains uniform material thickness. It also ensures the air-release channels remain open.
Proper heat gun usage requires distinct finesse. Soften the material just enough for compound curves. Do not melt the outer polyurethane layer. Keep the heat gun moving constantly to avoid scorching.
Post-Heating: This is the critical final step. You must heat the installed film to 190°F–210°F. Use an infrared thermometer for accuracy. This process kills the material's "memory." It permanently prevents the edges from shrinking back when exposed to sunlight.
Relieve surface tension before you make any cuts. Otherwise, the film will immediately pull away from the edges. Use a sharp, fresh blade for every cut. Snap off dull blade sections frequently. Employ a precise micro-squeegee. Tuck the film seamlessly deep into the housing gaps.
Even experienced installers face occasional issues. Recognizing the root cause helps you correct it quickly.
Fingering/Wrinkles on Edges: This happens due to localized over-stretching. You might be pulling the film in the wrong direction relative to the curve. Always pull away from the primary tension point. Spread the tension over a wider area.
Bubbling and Lifting: This usually indicates leftover surface contaminants. It also happens if you trap air using improper squeegee techniques. Failing to post-heat the edges guarantees premature lifting.
Adhesive Lines/Stretch Marks: These result from lifting the film too aggressively during application. Applying high heat while pulling also causes these permanent blemishes. Treat the film gently during repositioning.
Customizing your exterior requires a deliberate approach. Always prioritize high-quality cast vinyl over cheap alternatives. Select conservative VLT percentages carefully. This ensures you balance aggressive aesthetics against critical road safety. Professional results demand patience and high-grade materials.
Before you begin, audit your local traffic laws. Gather the correct professional tools. You will need a reliable heat gun. You need proper squeegees. You must use knifeless tape for safe cutting. Allocate sufficient time specifically for surface preparation. Proper prep dictates your final result. Take your time. Do it right the first time.
A: It generally does not void the entire warranty. However, dealerships may deny specific claims related to electrical housing failures. If poor heat management cracks the lens, they will not cover the replacement. Using removable vinyl minimizes these warranty risks effectively.
A: High-quality cast PET films usually last between three to five years. Calendered PVC films often degrade or shrink within a year. Regular parking in direct sunlight accelerates UV breakdown. Proper maintenance extends their usable lifespan significantly.
A: Halogen bulbs generate significantly more heat than LED diodes. This excessive heat can scorch or melt cheaper tint films. Always verify the temperature rating of your chosen vinyl. Cast films handle halogen heat much better than standard PVC alternatives.
A: Use a heat gun on a low setting. Warm the film gently to soften the underlying adhesive. Pull the material back at a sharp 45-degree angle. Clean any remaining sticky residue using a dedicated automotive adhesive remover and microfiber towels.


