
Views: 0 Author: Site Editor Publish Time: 2026-06-24 Origin: Site


A slight miscalculation while reversing or a scrape against a parking block can easily pop a front panel loose. It happens to careful drivers daily. Suddenly, you find yourself staring at an unsightly, glaring seam. Ignoring this gap puts you at immediate risk. You face highway detachment, dangerous sensor misalignment, and creeping structural damage. Loose plastic catches wind at high speeds. It threatens sudden failure and compromises your safety on the road.
Our goal is to provide a clear, actionable diagnostic framework. We will help you evaluate the damage correctly. You will discover exactly when you can pop the panel back into place safely. We also cover when you should tackle a minor DIY fix, or when you absolutely must book a professional body shop appointment to restore your vehicle's structural integrity.
Safety First: Aerodynamic drag at highway speeds can rip a partially detached bumper off entirely; secure it immediately before driving.
Diagnosis is Key: Most loose bumpers are caused by snapped plastic retainer clips, torn mounting tabs, or bent internal brackets.
DIY vs. Pro: Replacing a $5 plastic clip is a 10-minute DIY job; repairing torn tabs or recalibrating embedded safety sensors requires professional intervention.
Quick Fix Limits: Zip-ties and duct tape are emergency workarounds, not permanent or compliant repair strategies.
Start with immediate triage before you even think about getting back behind the wheel. Walk around your vehicle. Push gently against the loose cover to test its stability. You need to know if it feels reasonably secure or excessively wobbly. This hands-on visual check determines if you can safely drive home or if you need immediate roadside assistance.
You must understand the severe aerodynamic risks involved. When you drive over 40 mph, forceful wind rushes directly into the panel gaps. High-speed wind creates massive outward pressure inside the bodywork. This pressure effectively turns a loose automotive bumper into a parachute. The resulting drag can violently tear the entire assembly away from the vehicle frame. A detached panel on the highway puts you and the drivers behind you in extreme danger.
Next, carefully inspect clearance and look for wheel rub. Look closely inside both front wheel wells. Check if the plastic splash liner hangs down near the rubber. Verify if any cover edges rub against your tires when turning the steering wheel. Tire friction melts plastic panels rapidly and can easily trigger a dangerous high-speed blowout. If you hear grinding, scraping, or squealing noises as you move, stop the vehicle immediately.
Consider temporary emergency holds if you are stranded. Sometimes you just need to limp the vehicle to a safe, well-lit location. You can use strong automotive-grade tape or heavy-duty zip-ties for very short distances. Keep your driving speed extremely low. Remember, these crude fixes only serve to get you off a busy road. They do not replace proper mechanical repairs.
You must identify the exact underlying damage before attempting any permanent repairs. Grab a strong LED flashlight. Peer closely into the gap between the metal fender and the plastic cover. You can usually spot the culprit without removing the entire front assembly.
Understand the crucial difference between retainer clips and mounting tabs. Standard plastic retainer clips snap firmly into designated bracket holes. They deliberately shear off or pop out during minor impacts to absorb kinetic force. Replacing a broken push-pin clip is an incredibly easy, cheap fix. Conversely, mounting tabs are the molded plastic loops permanently integrated into the cover itself. If these delicate loops tear completely, new clips have nothing to grab onto. Torn tabs represent a complex fix requiring specialized tools.
Always check internal bracket integrity. A hidden support bracket physically holds the outer cover to the chassis. It usually consists of heavy-duty composite plastic or stamped metal. If this internal bracket shatters, cracks, or bends inward during an impact, simply pushing the cover back into place will fail. It will inevitably pop out again because the structural foundation remains severely compromised.
Do not skip the sensor alignment check. Modern vehicles house numerous sensitive electronics directly behind the front fascia. Inspect your parking sensors, fog light wiring, and ADAS (Advanced Driver Assistance Systems) modules. Look for strained wire harnesses, pinched cables, or exposed sensor heads. Misaligned sensors can severely compromise your vehicle's automatic braking systems and adaptive cruise control.
Best Practice: Always use a bright flashlight to look for white stress marks on black plastic tabs. White lines indicate the plastic is stretched and close to breaking entirely.
Common Mistake: Do not use brute force to smash a misaligned panel back into place. Pounding on it aggressively can shatter hidden brackets or snap your remaining intact tabs.
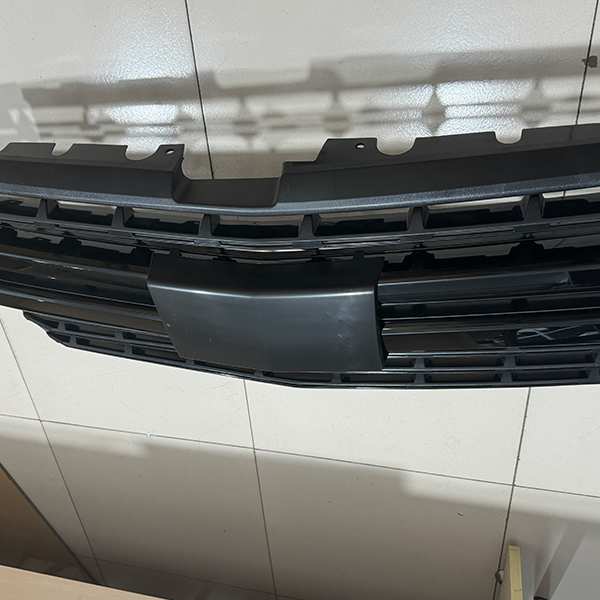
Deciding between a weekend garage project and a professional body shop visit requires absolute honesty. You must accurately match your mechanical skills against the true severity of the damage.
Review the success criteria for DIY fixes first. You can usually handle this at home if the damage remains strictly limited to missing or broken push-pins. The molded mounting tabs on your car bumper must be fully intact and uncracked. You should not see any severe paint cracking, clear coat peeling, or structural panel deformation. If the edges align perfectly when you apply light pressure, attempting a DIY fix is a highly safe and economical bet.
Know exactly when to outsource the job to a shop. Professional intervention becomes necessary if the plastic cover is severely warped or heavily creased. Deep creases in thick plastic do not pop out easily without industrial heat guns. If mounting tabs are ripped entirely, skilled technicians must use nitrogen plastic welding tools to rebuild them. Furthermore, if the impact disturbed any embedded safety sensors, a shop must officially recalibrate them. Proper calibration requires highly specialized computer software to ensure advanced driver systems function properly on the road.
Review this Cost-to-Outcome Matrix to guide your repair strategy decision:
Repair Strategy | Estimated Cost | Expected Outcome | Best Used When |
|---|---|---|---|
OEM Clip Kit (DIY) | $10 - $25 | Factory fitment completely restored | Only clips are snapped; all tabs remain intact |
Minor Shop Realignment | $100 - $300 | Secure structural fit, minor surface scuffs may remain | Internal brackets slightly bent; sensors unaffected |
Bracket/Tab Repair | $300 - $600 | Structural integrity fully restored via plastic welding | Torn mounting tabs; shattered internal bracket segments |
Full Replacement | $1,000+ | Brand new factory appearance and crash structure | Severe panel warping; major direct collision damage |
Tackling minor panel repairs yourself saves significant time and money. Gathering the correct specialized materials is your first critical step. Never try prying modern plastic body panels with standard flathead screwdrivers. You will permanently scratch the paint and damage the clear coat.
Tooling Requirements:
Non-marring plastic trim removal tool set
Vehicle-specific OEM-spec retainer clips and push-pins
A bright LED mechanic's flashlight
A 10mm socket wrench set for wheel well screws
Follow this detailed step-by-step realignment process to ensure a secure, permanent fix.
Clear the Area: Use your plastic trim tool to carefully extract broken clip stems. You must remove all shattered plastic debris from the bracket holes before inserting new fasteners. Leftover debris prevents clips from locking.
Align the Seams: Lift the panel carefully with both hands. Seat the cover edge precisely into the fender bracket channel. Ensure the panel seams match the factory body lines perfectly before applying any pressure.
Apply Even Pressure: Place your palm completely flat against the panel surface. Push firmly and evenly to pop the edge back into the locking channels. Striking it sharply with a fist risks cracking the paint.
Secure Fasteners: Insert the brand new push-pins completely through the aligned holes. Lock them down tightly by pushing the center pin flush. Finally, replace any 10mm metal screws inside the wheel well to anchor the bumper firmly to the underlying chassis.
Always purchase exact OEM-spec clips from a dealer or reputable parts supplier. Generic auto parts store clips often fit loosely, allowing the panel to vibrate out over time.
Automotive community forums remain full of highly creative repair hacks. However, you must evaluate these social media solutions objectively before modifying your daily driver.
Many car enthusiasts rely heavily on thick nylon zip-ties. The car community affectionately calls this the "drifter fix."
Pros: Zip-ties are extremely cheap and highly accessible. You can buy them anywhere and fix a hanging panel temporarily in a grocery store parking lot.
Cons: Zip-ties completely lack the sheer strength required for actual collision safety. They look sloppy and unprofessional. Worse, they degrade rapidly outdoors. Sustained UV exposure from the sun and constant engine vibration cause them to turn brittle and snap unexpectedly.
Other drivers install aftermarket quick-release fasteners. These kits use heavy rubber O-rings stretched over metal mounting pegs.
Pros: These kits are incredibly useful for dedicated track-day cars requiring frequent front-end removal for rapid maintenance.
Cons: Installation requires drilling permanent, highly visible holes into your painted fenders. This permanently alters the vehicle body. Furthermore, unsealed drilled holes quickly become fast-spreading rust points if the bare metal remains untreated.
Keep strict legal compliance in mind. Depending on where you live, state vehicle inspections may aggressively flag these community hacks. Safety inspectors will fail a vehicle instantly if it relies on visible zip-ties for structural bodywork retention. True road safety dictates the use of rigid, factory-approved mechanical fasteners.
Sometimes professional help is completely unavoidable due to severe damage. Understanding the traditional body shop process empowers you as a consumer and prevents overcharging.
Expect a specific standard operating procedure at any reputable collision center. Mechanics will fully remove the cover to perform a comprehensive internal inspection. They look for hidden crush-zone damage. They will execute specialized nitrogen plastic welding for torn structural tabs. They replace shattered internal brackets entirely rather than gluing them. Finally, they run advanced diagnostic software checks for proper sensor recalibration.
Evaluating shop quotes requires sharp attention to detail. A massive price difference usually indicates vastly differing repair strategies. Learn to spot the difference between a shop quoting an honest, minor clip replacement versus one pushing an entirely unnecessary full cover replacement. Ask the estimator to physically show you the torn tabs if they insist on ordering a brand new panel.
Consider your auto insurance implications carefully. Weigh your out-of-pocket costs against your exact policy details. Filing an official claim for a minor $400 bracket repair makes absolutely no sense against a standard $500 deductible. Even a minor zero-payout claim can easily trigger a substantial premium hike during your next renewal period.
Take decisive next-step actions when speaking to mechanics. Ask them direct, specific questions. Find out if they plan to use genuine OEM brackets or cheaper aftermarket alternatives that might cause fitment gaps. Ask if they provide a written warranty guaranteeing long-term panel alignment and sensor accuracy.
Navigating front-end vehicle damage does not have to be an overwhelming or stressful experience. By accurately assessing aerodynamic risks and properly diagnosing the underlying hardware, you take immediate control of the situation. Always weigh your personal DIY capabilities honestly against the true severity of the structural damage.
Replacing a few snapped plastic clips serves as a highly effective, low-cost weekend project. However, you must prioritize secure, reliable vehicle fitment over cheap aesthetic shortcuts. Your vehicle's crash safety systems rely heavily on intact internal brackets. Compromising on structural integrity puts you and your passengers at serious risk. Take decisive action today by inspecting those hidden mounting tabs, gathering the correct OEM tools, or scheduling a comprehensive evaluation with a trusted local mechanic.
A: You should avoid driving if the panel feels excessively loose. Aerodynamic drag at speeds over 40 mph can catch the loose edges, acting like a parachute. This pressure can violently rip the plastic cover away, endangering you and other drivers. If you must drive to a repair location, use temporary automotive tape, avoid highways entirely, and keep your speed strictly under 30 mph.
A: Costs vary drastically depending on the root cause. A simple DIY fix using replacement OEM retainer clips ranges from $10 to $30. If you require minor professional shop realignment for bent brackets, expect to pay between $100 and $300. Complex repairs involving torn mounting tabs, plastic welding, or full cover replacements will easily exceed $500.
A: Yes, it frequently fails state safety inspections. Regulations vary strictly by state, but most jurisdictions prohibit any protruding body parts or unsecured panels that pose a road hazard. Relying on visible zip-ties or duct tape for structural bodywork retention usually guarantees an instant failure during an annual safety check.
A: No, gluing broken clips is highly ineffective. Automotive adhesives and superglues fail rapidly under constant engine vibrations, rough road impacts, and extreme seasonal temperature shifts. Plastic clips are specifically engineered to flex and lock mechanically. You must use proper replacement fasteners to ensure the panel remains securely anchored to the vehicle chassis.


